Title here
Summary here
If you are using Windows 10, please refer to this guide to ensure proper functionality of the MOD: Windows 10 Related Issues
Ensure Microsoft Flight Simulator (MSFS) 2024 is NOT running before you begin. If the simulator is running when you click “Start” in the MOD, the service may fail to load.
Open the MSFS2024 Map Enhancement application and configure the settings correctly. There are two versions of the app — one for MSFS 2020 and one for MSFS 2024 — so make sure you are using the correct version. You should find two icons on your desktop after installation.
Configure the Game rolling cache path. If you’re unsure, click “Use default location” Notes:
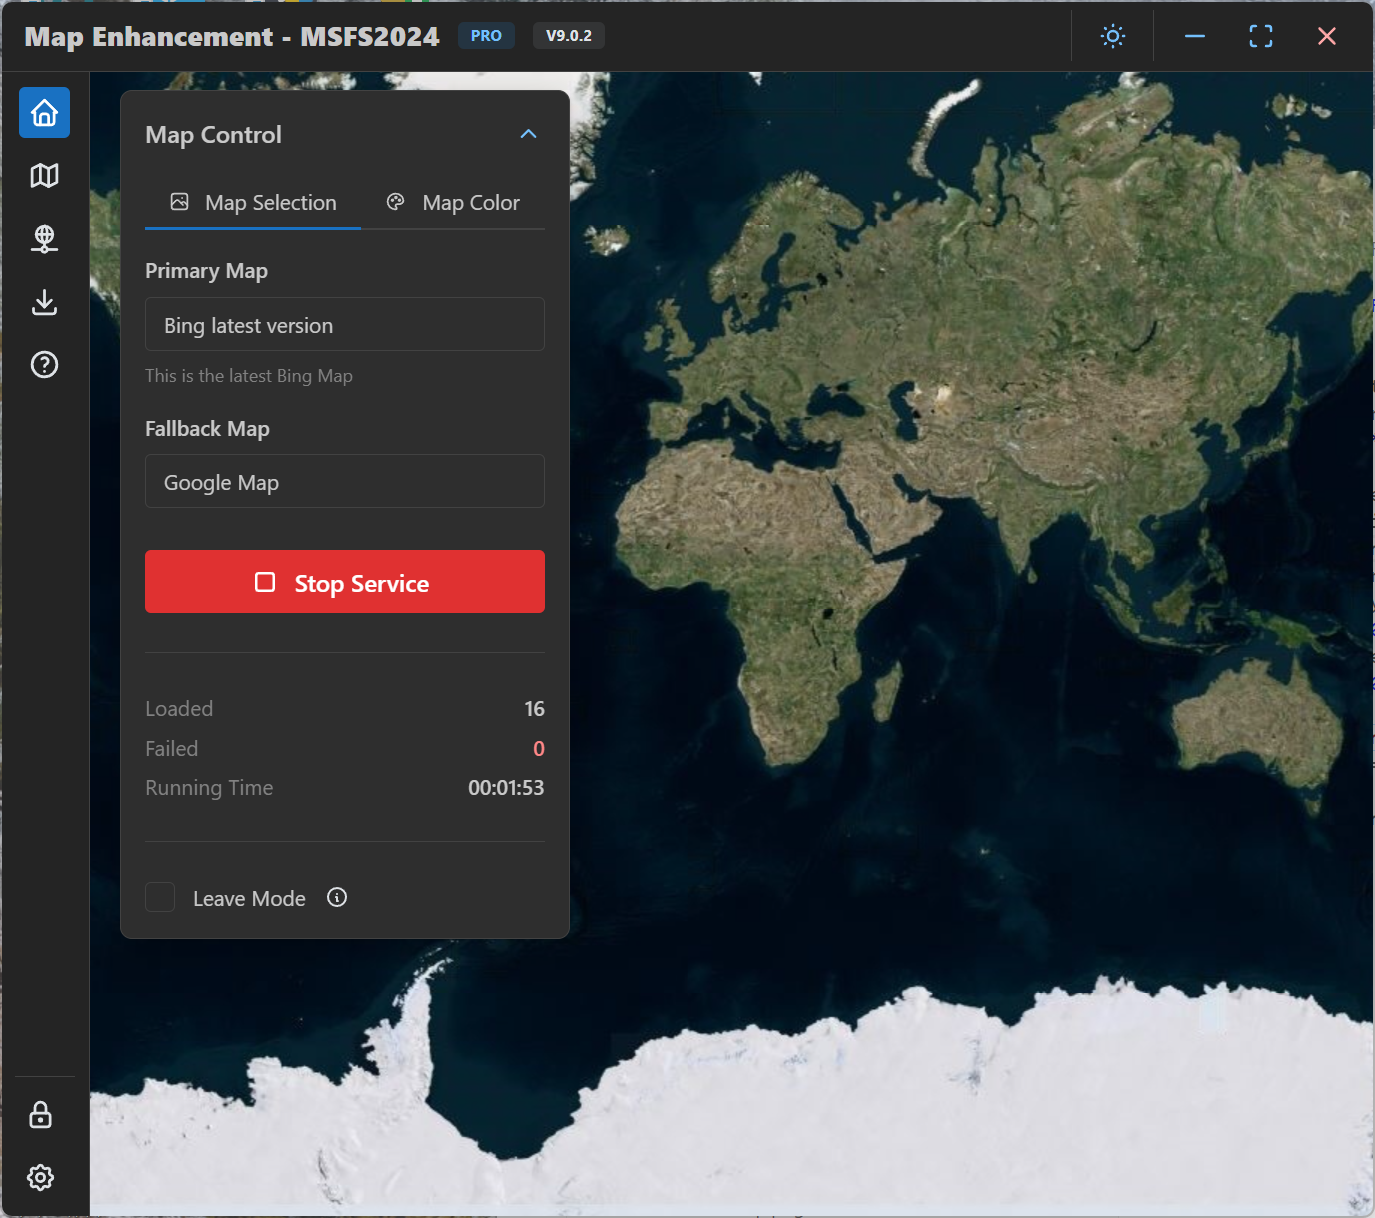
On the home page, pick your preferred map source. If you’re unsure, try Bing Map (Latest) or ArcGIS.
License page, enter the email and username used to purchase the license, then click Link Device. If linking succeeds, your license details will be displayed.If everything is working, the Loaded value counter will increase gradually. You can drag the map to see the tiles for your selected area.
Start the simulator and enter the main game screen — the newest map tiles should appear. The Loaded counter continues to change as you pan the map. If the counter shows persistent errors or grows without settling, check your network configuration.
You should now be ready to play. If you encounter any problems, please refer to the FAQ for troubleshooting steps.